



SSH access for peaknetworks hostings
For some time now, peaknetworks hostings have supported access via SSH. Here we explain what SSH is, how you can set up SSH on your computer and how SSH is used to facilitate the administration of your website.
What is SSH (Secure Shell Protocol)?
SSH is an encrypted network protocol that allows you to connect to servers. It is the de facto standard for the administration of UNIX and UNIX-like operating systems. SSH makes it possible to execute commands directly on the server. It can also transfer and manage files using SFTP and SCP. All information sent via SSH is encrypted and cannot be viewed from the outside.
How do I connect to my peaknetworks Hosting via SSH?
You can connect to SSH via the command line (shell) of your computer. The shell depends on your operating system (macOS: zsh, Linux: bash, Windows 10/11: PowerShell). You can open it by entering "Terminal" in the search bar on your desktop and opening the application.
To test whether SSH is running on your computer, simply enter the following in the terminal window:
sshIf you then see the following text, ssh is installed on your computer:
usage: ssh [-46AaCfGgKkMNnqsTtVvXxYy] [-B bind_interface] [-b bind_address]
[-c cipher_spec] [-D [bind_address:]port] [-E log_file]
[-e escape_char] [-F configfile] [-I pkcs11] [-i identity_file]
[-J destination] [-L address] [-l login_name] [-m mac_spec]
[-O ctl_cmd] [-o option] [-P tag] [-p port] [-Q query_option]
[-R address] [-S ctl_path] [-W host:port] [-w local_tun[:remote_tun]]
destination [command [argument ...]]
Perfect, the first step is already completed.
Generating an SSH-Key
For SSH authentication, either a password or a so-called SSH key is required. As passwords are often associated with security concerns, we at peaknetworks only allow authentication via a key. This key is based on an asymmetric crypto. This means that a key pair is created consisting of a private key and a public key. The private key must be stored securely and may not be passed on to third parties. The public key, on the other hand, can be stored on external servers, for example, in order to log in there without a password.
In order to generate the SSH Key-Pair, you have to execute the following command in your terminal:
ssh-keygen -t rsaThis command requires your input. First, it will ask where to store the keys. Here, you can just press enter to use the default SSH directory. Next, you can optionally secure the key with a password. If you want to skip this step, press enter twice.
If everything went well, you can view your keys in the .ssh/ directory. To do this, simply execute the following command:
ls ~/.ssh/This command lists all files in the SSH directory. Here you should see two neu files: "id_rsa", your new private key, and "id_rsa.pub", the public key.
Adding an SSH key to your peaknetworks Hosting
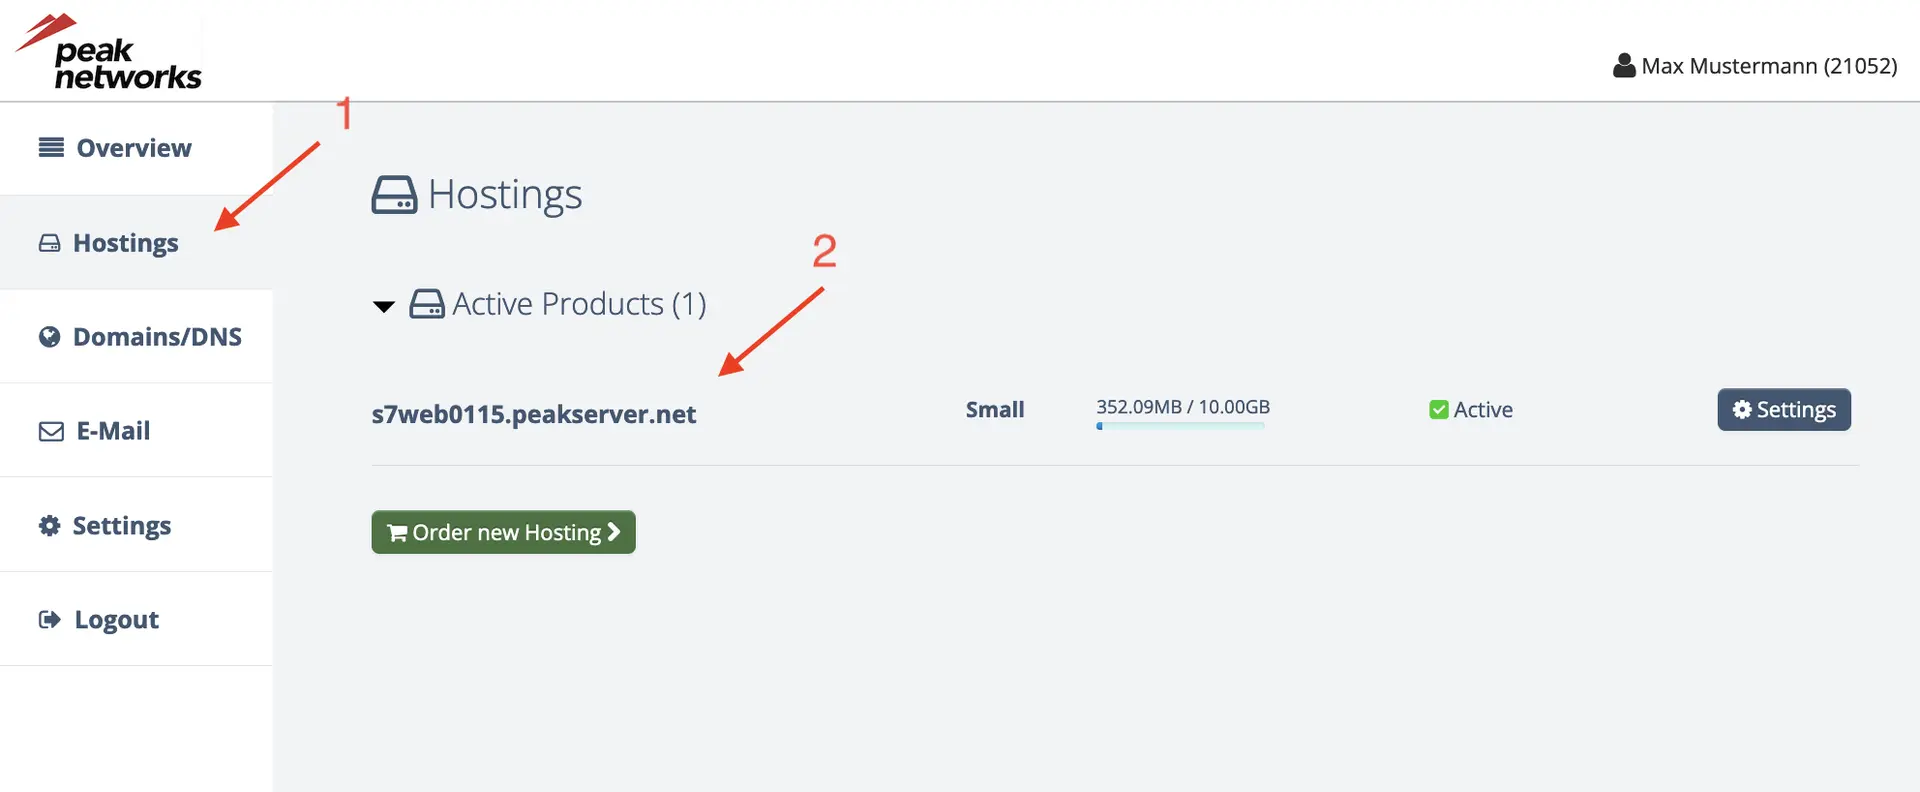
Before you can connect to your peaknetworks hosting, you must add the public SSH key in the peaknetworks Control panel. To do this, simply login with your credentials, then click on "Hostings" [1] in the left-hand tab, select the hosting [2] which you want to access and finally go to the "SSH" tab[3].
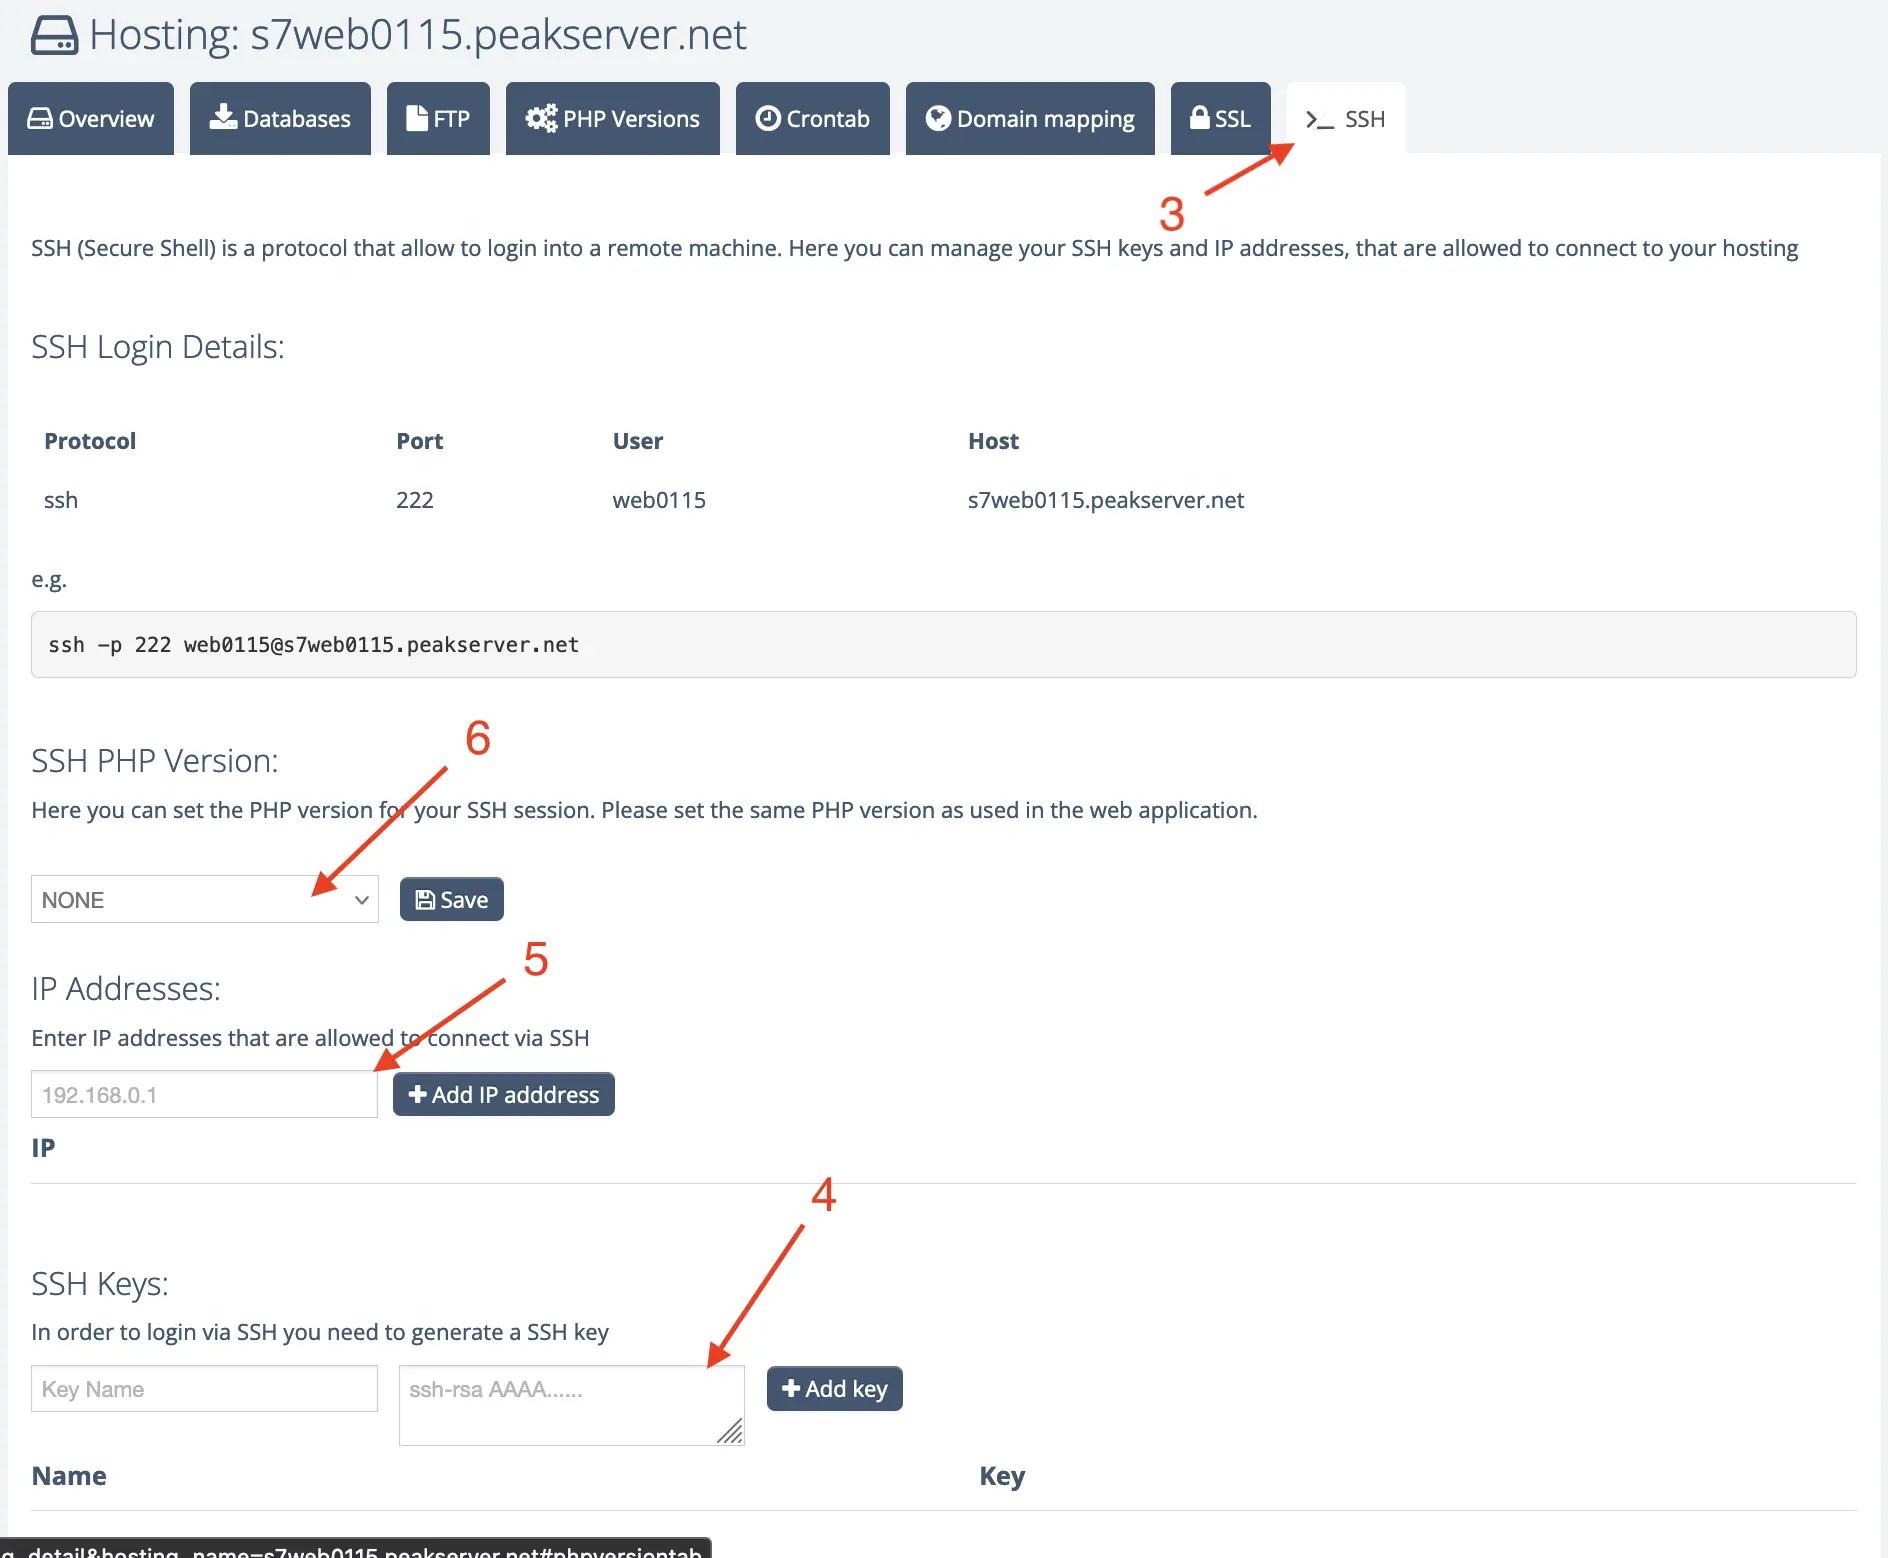
On the bottom of the page you will find your SSH Keys[4]. Enter a unique name into the field "Key Name" (e.g. the name of your laptop or computer). In the field next to it, you can add your public SSH key. In order to copy your key, you can enter the following command into your terminal:
cat ~/.ssh/id_rsa.pubYour terminal window should now display a text which starts with "ssh-rsa ..." and ends with a mail address. Please select this text, copy it (Windows: Ctrl+c, macOS: Cmd+c, Linux: Ctrl+Shift+c) and add it to the input field of the control panel. Finally, press the "+" button and your SSH key will be added to your hosting.
Unlock your IP address and select a PHP version:
In addition to the SSH key, you must also enable your public IP address for SSH. You can use our "What is my IP address?" tool to do this. Simply copy your IP here and add it to the IP field [5].
If you want to use PHP in your SSH session, you can select on in the dropdown [6]. Please note that this should match the PHP version of your application.
Establish an SSH connection:
Once you have added your key and the IP has been unlocked, you can connect using SSH. To do this, simply copy the command from the "SSH Login Details" in the hosting settings and paste it into your terminal. After you have pressed the enter key, you must confirm the connection with "yes" the first time and can now get started.
Example: Laravel Installation
Here, we show you an example of how you can install the Laravel Framework on your web hosting using SSH.
- Install the PHP packet manager "Composer":
mkdir ~/bin/ ; cd ~/bin/ ; wget https://getcomposer.org/download/latest-stable/composer.phar && chmod 0750 composer.phar- Create a Laravel application. Please change the last argument (mylaravel-app) to the name of your project
cd ~/web/; ~/bin/composer.phar create-project laravel/laravel mylaravel-app-
If everything went smoothly, you can access your Laravel-App with the following URL: http://sXweb0YYY.peakserver.net/meinelaravel-app/public/
-
Finally, you can create a database in the peaknetworks control panel and the credentials to your Laravel Environment. You can find your configuration file here:
~/web/mylaravel-app/.env