 CH
CH
 DE/AT
DE/AT
 EN
EN
What is the Hosts file?
The hosts file is a text file that associates IP addresses with domains. It tells the system with which IP address a domain can be found. If there is an entry of a domain in the Hosts file, it has priority over the global DNS (Domain Naming Service), but is only visible locally to your PC.
Why do I need this file?
Such an entry in the hosts file allows you to test a hosting with associated domain name without it being visible to other visitors.
Another example is when a hosting exists, but no associated domain is available yet.
Another common reason is to test hosting during a migration. Once the tests on the new hosting are satisfactory, the entry in the hosts file can be removed - and set globally valid in DNS.
Edit Hosts File for Windows
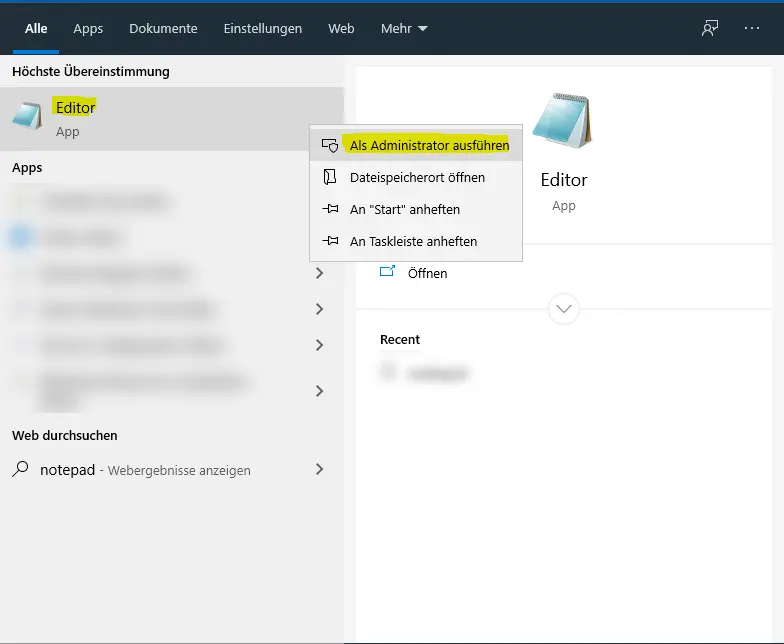
1. press the key on your keyboard and type "notepad".
Then click on the editor with the right mouse button and click on "Run as administrator" on the left.
A window should now pop up, click "Ok" there.
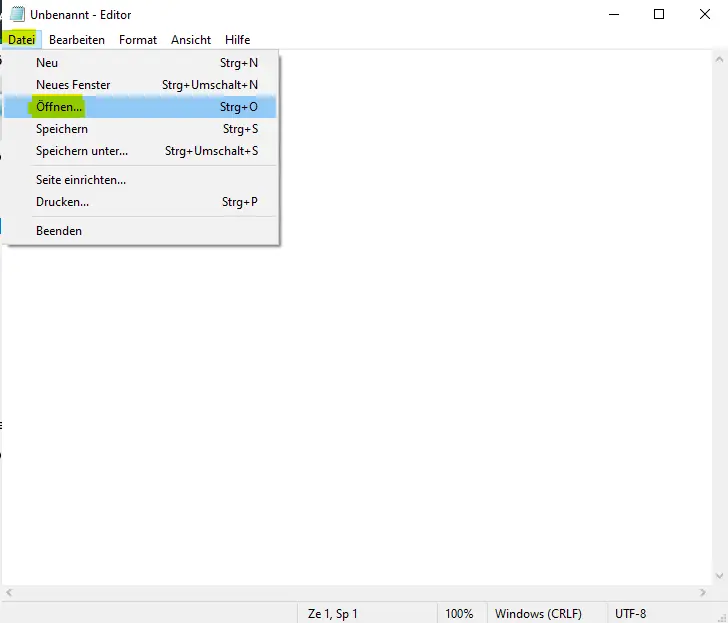
2. after you have opened the editor, click on "File" in the top left menu and then on "Open...".
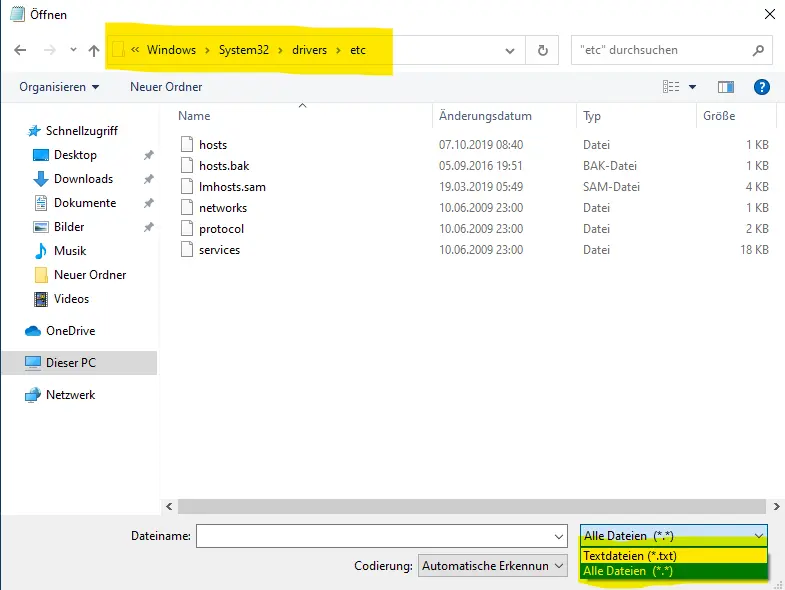
3. navigate to "C:\Windows\System32\driver\etc" and make sure that "All files (.)" is selected in the bottom left corner
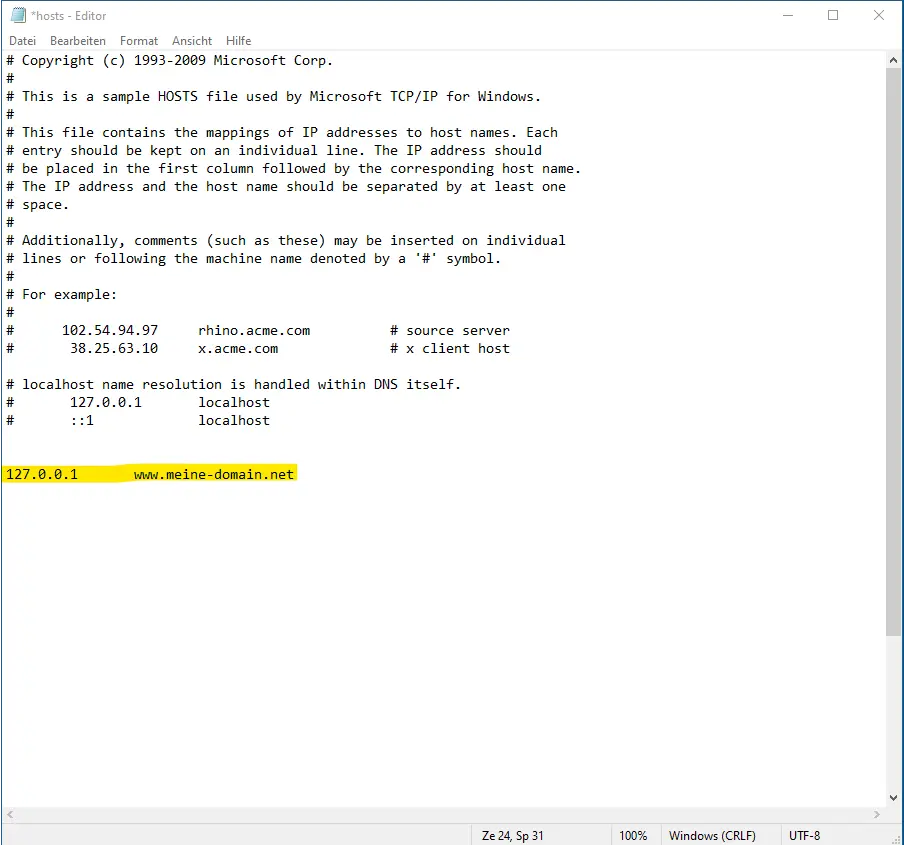
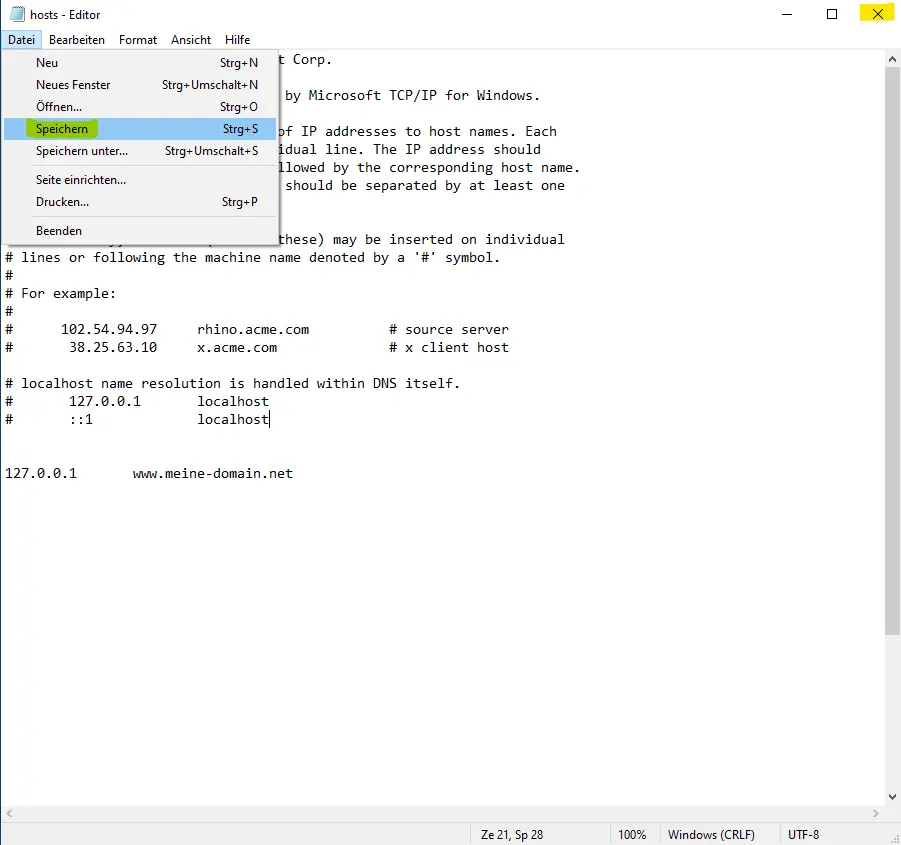
4. now you have the file open and can add your host entry. In this case the IP "127.0.0.1" now points to the domain "www.meine-domain.net".
5. Once you have finished editing, click on "File" in the upper left corner and then on "Save". After that you can close the window with the icon
Wonderful, you did it!
Edit Hosts file for macOS
1. open the "Finder" with the keyboard combination: ⌘+spacebar and search for "terminal". Then press the Enter key.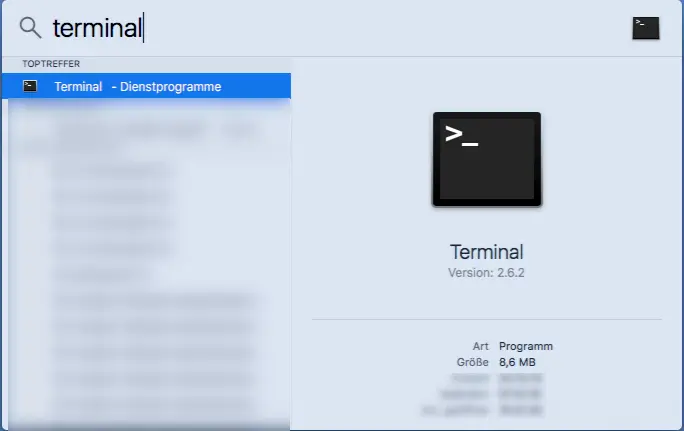
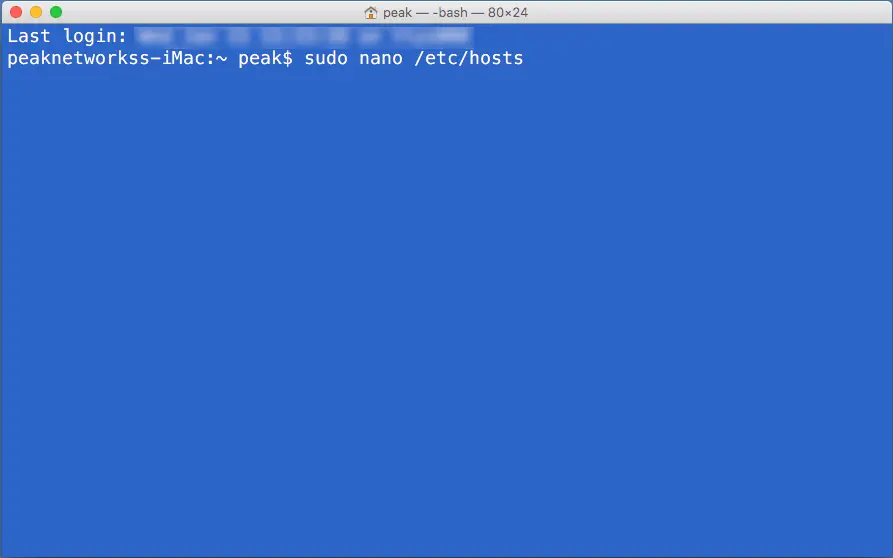
2. now a window should open. In this window type: "sudo nano /etc/hosts" and then press Enter. You will then be prompted to enter your password.
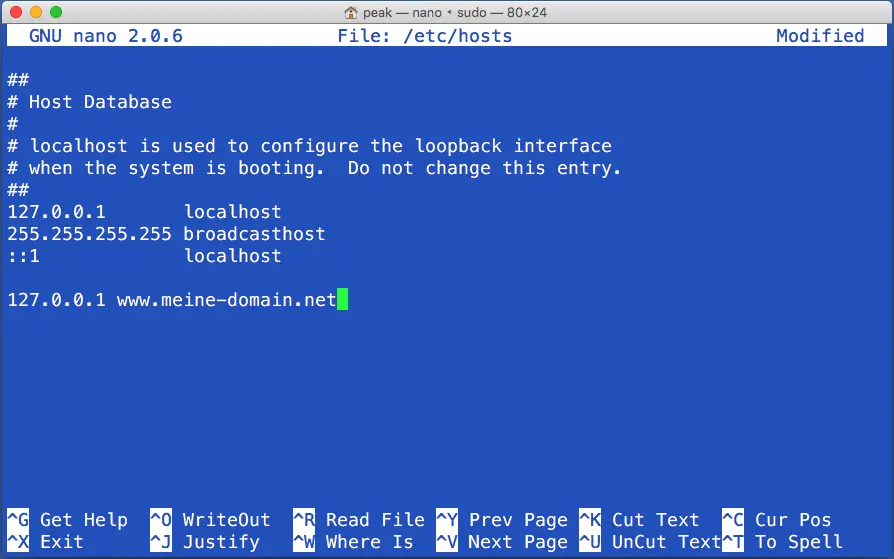
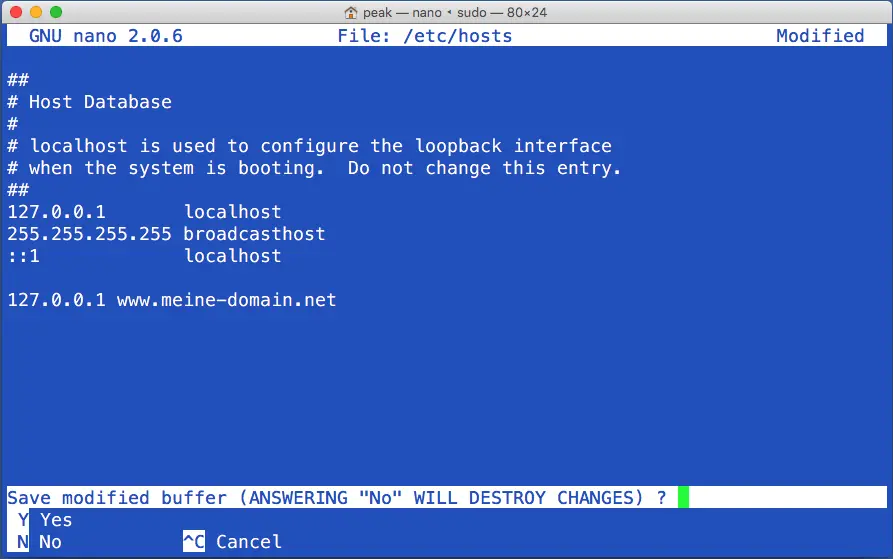
3. you are now in the text editor. navigate down with the arrow keys and enter your desired hosts entry. In this case, the IP "127.0.0.1" now points to the domain "www.meine-domain.net". After you have added the entry, press the keyboard combination: "Ctrl + X".
4. Now you will be asked if you want to save the file. Press the "y" key to do so.
5. Last but not least, you will be asked where you want to save the file. Simply press the Enter key here.
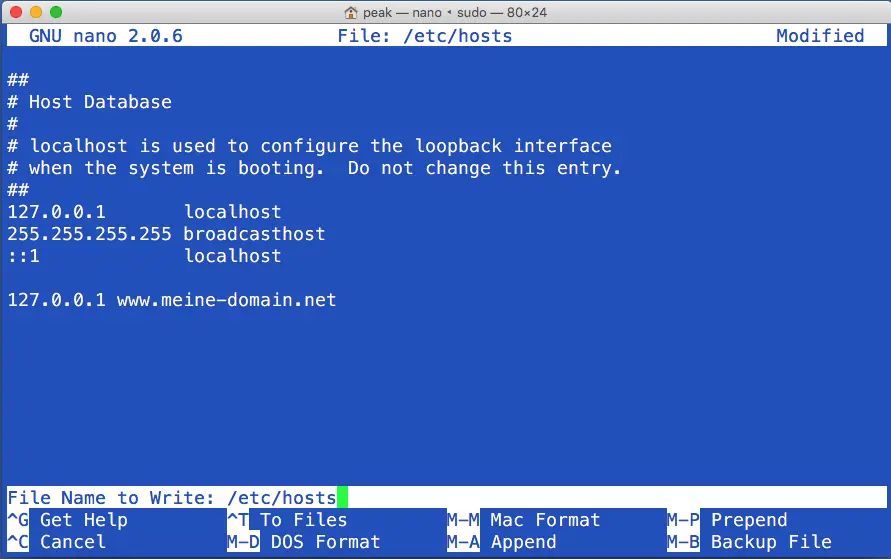
Now you have successfully added the entry. You can now close the window.
Edit hosts file for Linux
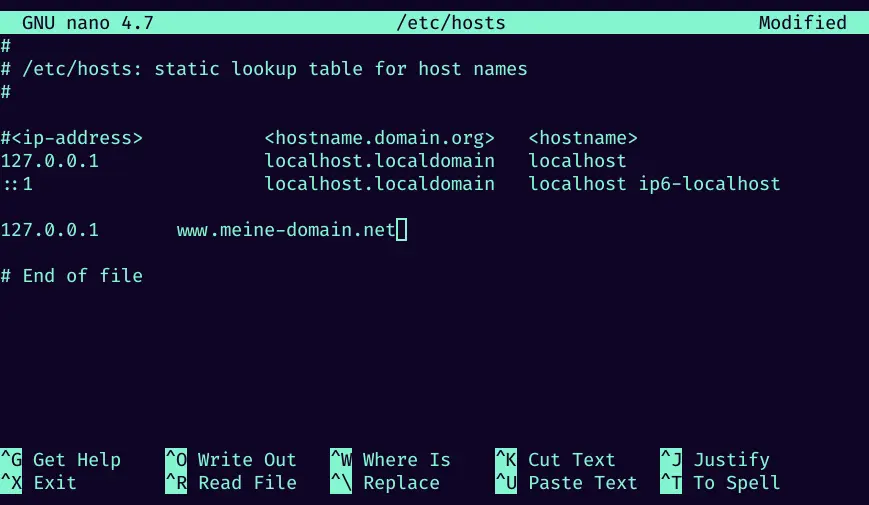
1. open your desired terminal in your Linux distribution and type "sudo nano /etc/hosts". Then press Enter and type your user's password.

2. you are now in the text editor. navigate down with the arrow keys and enter your desired hosts entry. In this case, the IP "127.0.0.1" now points to the domain "www.meine-domain.net". After you have added the entry, press the keyboard combination: "Ctrl + X".

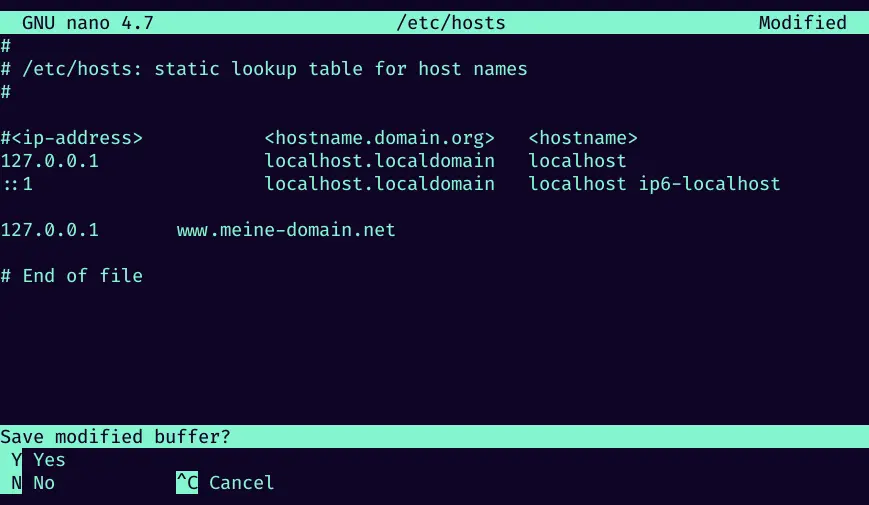
3. Now you will be asked if you want to save the file. Press the "y" key to do so.
4. Last but not least, you will be asked where you want to save the file. Simply press the Enter key here.
Now you have successfully added the entry. You can now close the terminal.